Setting up AWS CodePipeline to automatically trigger scans
To trigger CodeBuild to run the scan automatically on each new commit in your CfnGoat GitHub repository, we’ll need to configure AWS CodePipeline. You can skip this step, but if you do, you’ll only be able to run manual scans from the CodeBuild UI, AWS CLI, or APIs, which doesn’t provide the DevSecOps automation we’re looking for!
To set it up, go to AWS CodePipeline and select Create Pipeline:

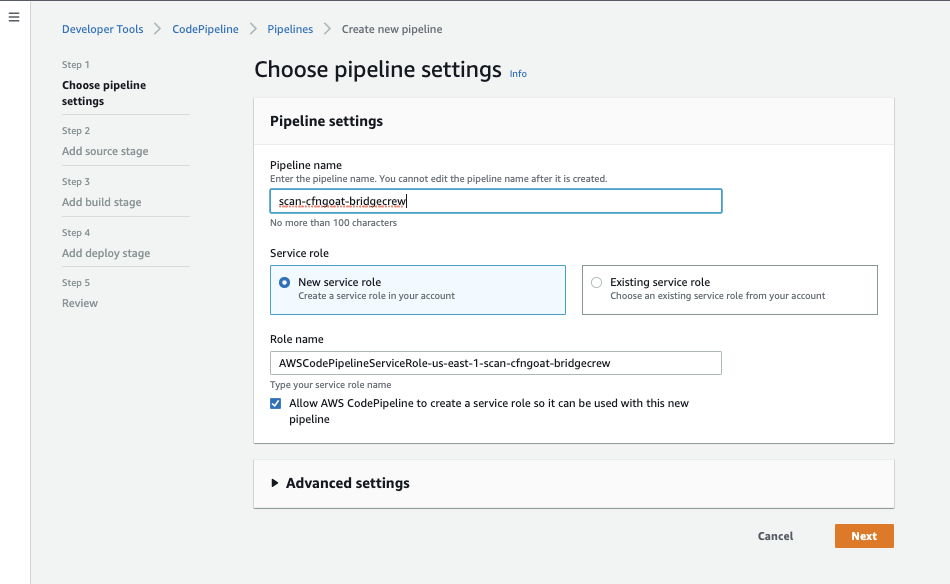
After giving the pipeline a name, (scan-cfngoat-pipeline) select Next.
Choose Github (Version 2) as the source provider.
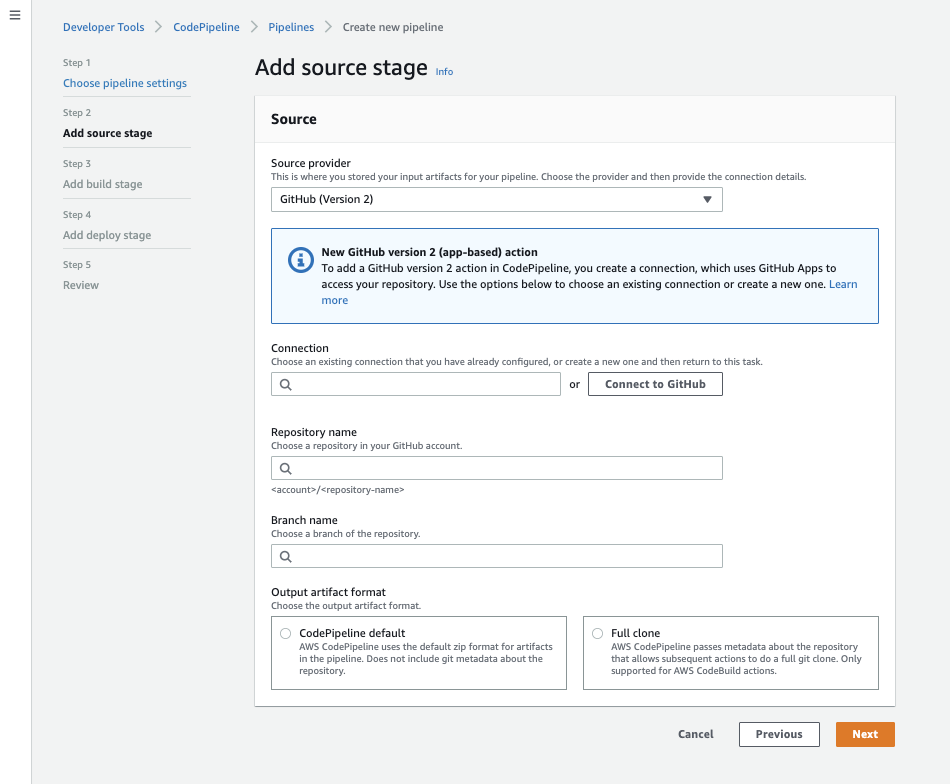
As CodeBuild and CodePipeline are different tools, you’ll also need to authorize CodePipeline to your GitHub account, select Connect to Github and follow the authorization redirects in the popup window.
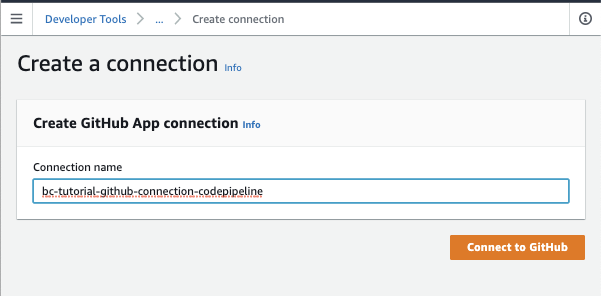
Give the Github Connection a name, for this workshop we are using bc-tutorial-github-codepipeline.

Select which Github Repositories you want CodePipeline to receive events for, in this case, i’ve just selected the CfnGoat repository.

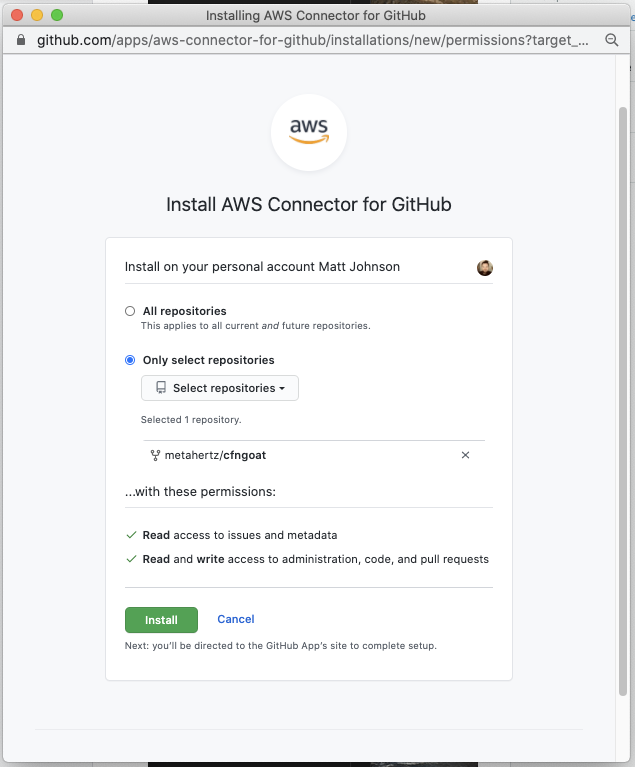
Once you’ve authorized GitHub, select Install a new app to finalize the GitHub integration and select Connect:

The CodePipeline screen should refresh with a green Sucessfully connected to GitHub message:
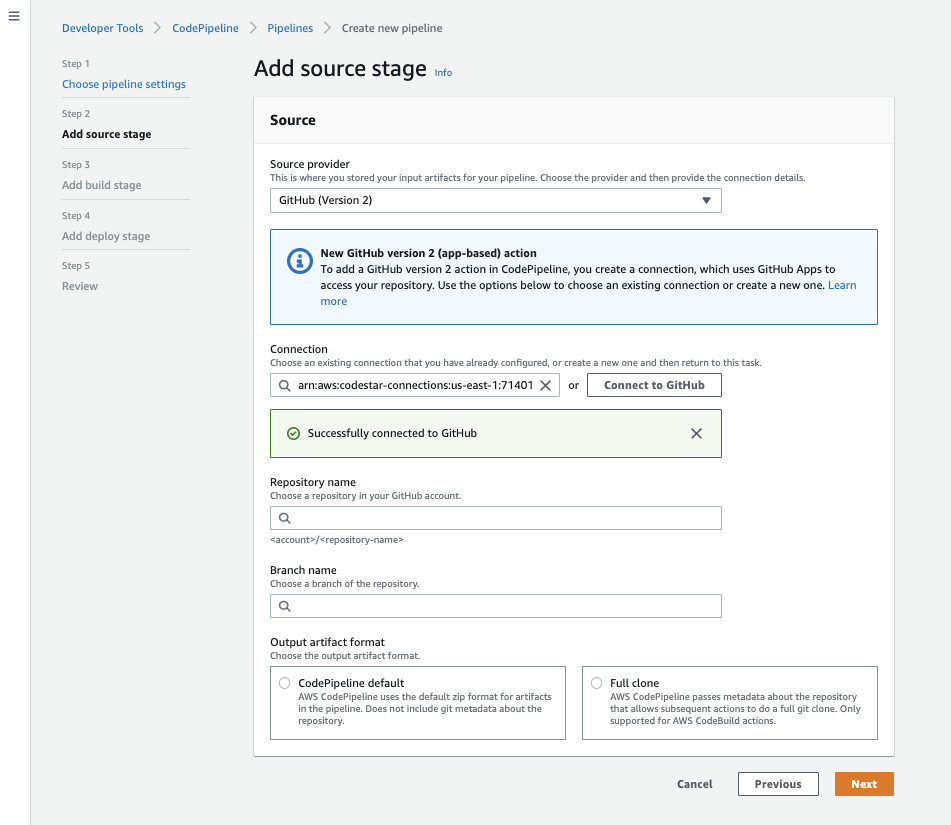
Now that CodePipeline has access to our GitHub repository, we can select it as the pipeline source. Select the master (or main branch) to have our pipeline run when commits to this branch occur:

We also want to ensure we are allowing CodePipeline to do a “Full Clone” here, as Checkov needs the git metadata from the cfnGoat repository to add the relevant data to new events in the Bridgecrew dashboard.
Instruct CodePipeline to trigger our CodeBuild
When CodePipeline sees a new commit in our GitHub repository, it will trigger a build action. To set this to be our CodeBuild commands, select the same region as the CodeBuild project, then select the CodeBuild project, bridgecrew-tutorial.
Leave the default of Single Build selected and select Next
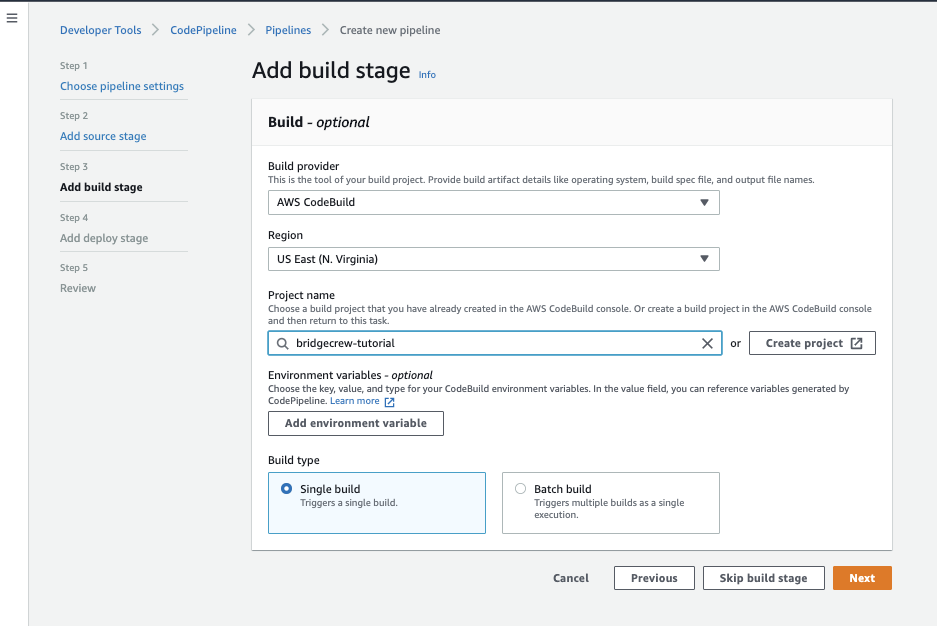
On the next screen, select Skip deploy stage. We don’t want to deploy our CfnGoat CloudFormation to AWS as we’re just highlighting how to stop a build from progressing if there are security violations!
One final IAM change
Remember we needed to allow CodeBuild to access our Bridgecrew API token earlier? Well, in the final bit of IAM plumbing for this whole workshop, we also need to allow CodeBuild to access the CodePipeline connection details.
This is because, when triggering CodeBuild manually, like we did earlier, CodeBuild pulls it’s own copy of our CfnGoat repo from GitHub, however, when triggered by CodePipeline, CodePipeline passes a reference of the repo (Using CodePiplines’ GitHub connection) to the CodeBuild, we’ll get all kinds of errors when CodeBuild tries to access the CodePipeline connection to Github if we dont do this.
All we need to do is add a new Inline Policy to the codebuild-bridgecrew-tutorial-service-role role with the following permissions:

Copy the ARN from under “ConnectionArn” under “Step 2: Add source stage.” In the example above it’s arn:aws:codestar-connections:us-east-1:714....
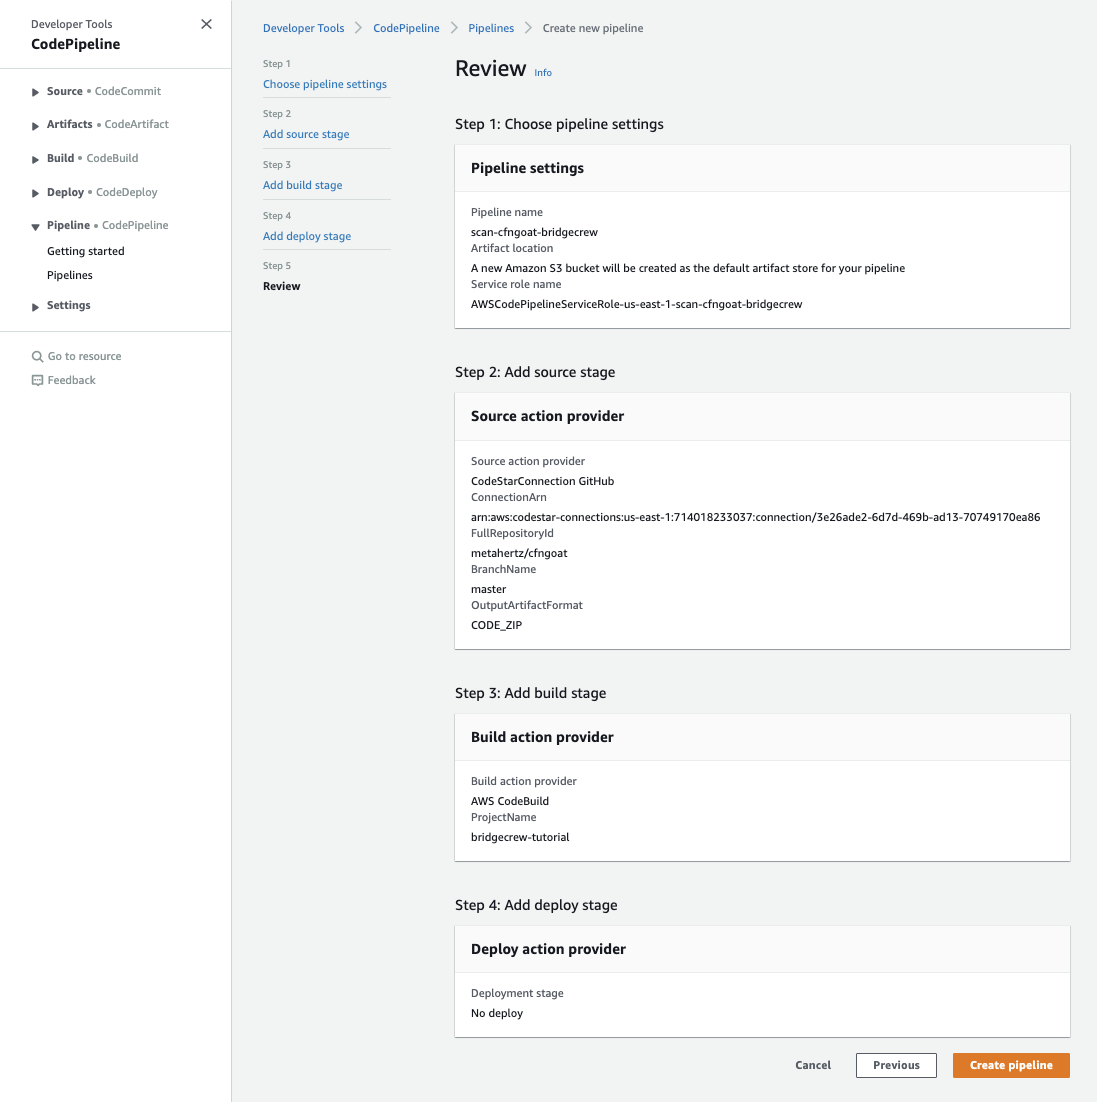
Now go to the AWS IAM dashboard, click on Roles and search for the role created by CodePipeline (“cfngoat” should help you find it.). Click on that role.

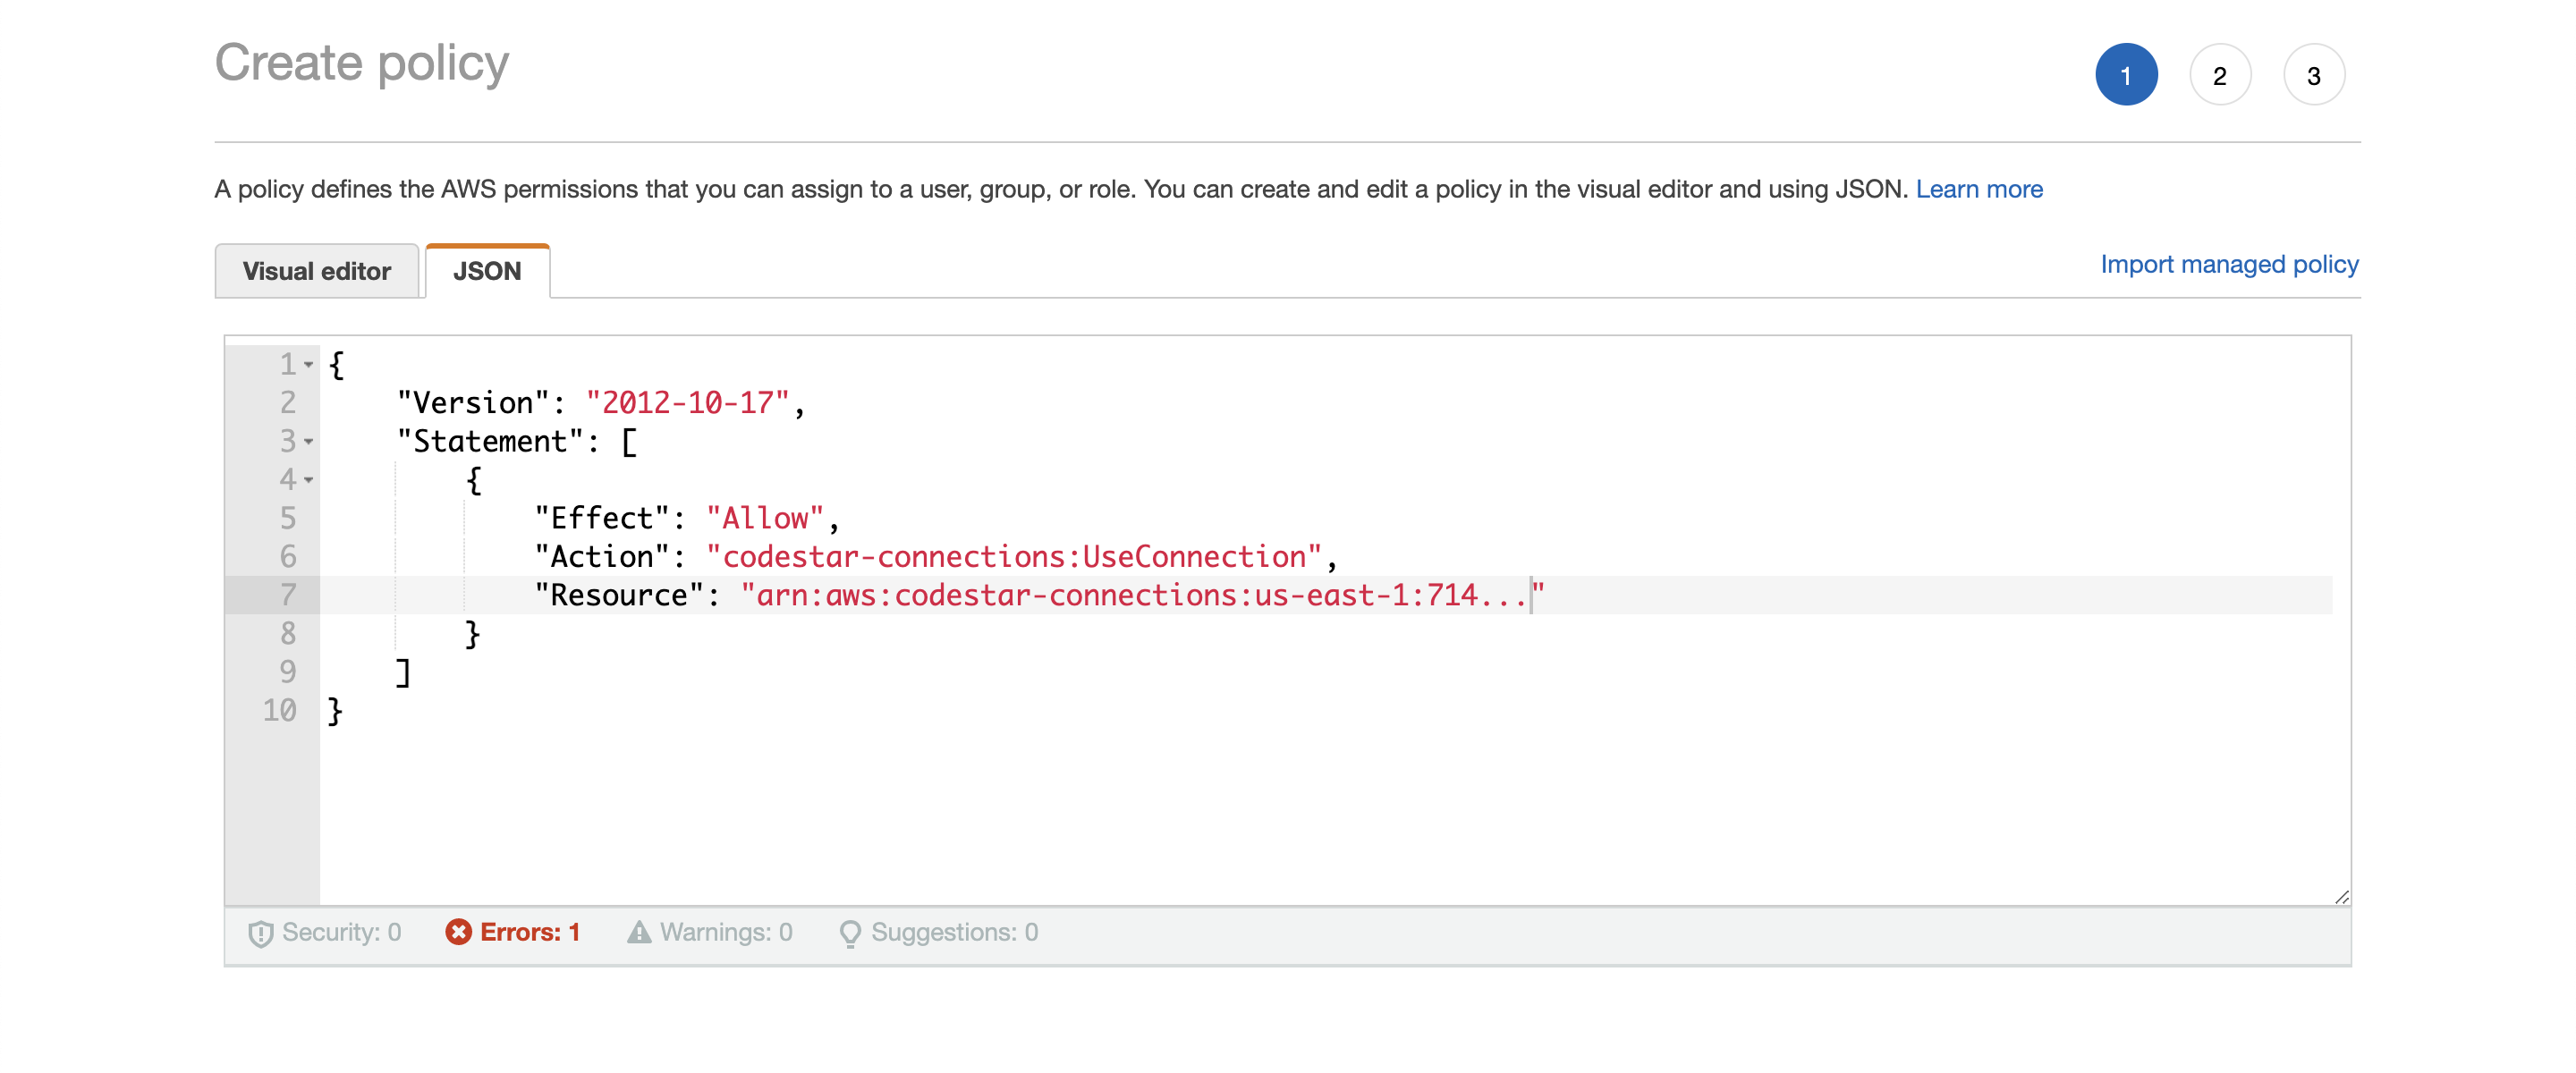
Under Add permissions click on Attach policies then Create policies. Click on JSON and fill in the following, replacing the ARN with your ARN from CodePipeline (should still be in your clipboard).
{
    "Version": "2012-10-17",
    "Statement": [
        {
            "Effect": "Allow",
            "Action": "codestar-connections:UseConnection",
            "Resource": "insert connection ARN here"
        }
    ]
}
Don’t worry about tags. Give your policy a name like connection-permissions and then Create policy. Return to the IAM page where you were attaching permissions, refresh the policy list, and select the policy you just created. Choose Attach policies.

Finally, go back to your CodePipeline and select Create pipeline on the review page, which will trigger your new CodePipeline to immediately run against the latest commit in our CfnGoat repository:

Now we don’t need to manually run the checkov CLI; your developers will get a Bridgecrew scan every time they commit!